In home decoration, more and more attention is paid to environmental protection concept decoration and the appearance of various new types of decoration materials. Many consumers choose such products, not only environmentally friendly green, but also beautiful appearance. The integrated wall surface is a wall decoration that has only been popular in recent years. How to install the integrated wall? Integrated wall installation need to pay attention to what? Today, we will introduce the integration of the relevant content of wall installation , learn to learn together under it!

First, integrated wall installation tool preparation
The tools needed to install the integrated wall are: impact drill, electric M6 sleeve, electric screwdriver, aluminum cutting machine, hand-held cutting machine, pistol drill, hole opener, needle nose pliers, M14 open end wrench, hammer, ink fountain, pneumatic nail Guns, Nails, Silicone Wires, Tape Measure, Glue Guns, White Masts, Glass Glue, Electrical Tapes, Industrial Alcohols, Utility Knives, Markers, Masking Paper, Rags, Gloves, Five-Level Spirit Levels, Workwear, Hand-held Woodworking Saw , Woodworking table saw.
Note: Tools for integration of bamboo and wood fiber integrated wall surfaces with aluminum alloys are all included, depending on the material of the wall surface, select tools.
Second, integrated wall mounting plate preparation
Before installation, first select the appropriate style of panel or customize according to the owner's design style. Then according to the shape and size of each space, ready to integrate wall panels and accessories.
Third, the integration of wall installation steps
1, on-site cleaning
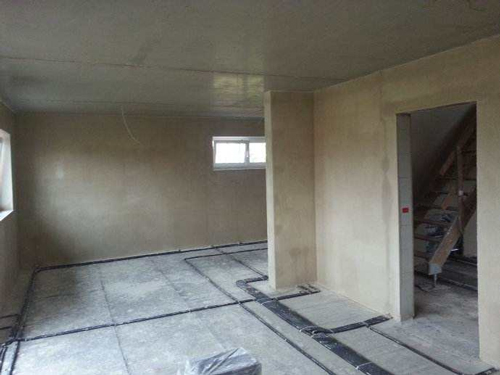
Clean up on-site construction waste, and create a good and safe construction environment; the walls must be kept flat, and local bumps must be filled or leveled.
2, measuring area
According to the design plan, measure the wall and ceiling installation area, select the appropriate product size according to the actual site conditions, and avoid unnecessary losses during the installation process.
(1) Estimated by the regular use of wall surface in home improvement, which is 3 times of the area, including the wall surface and the top. The basic installation area is within this area.
(2) Calculating the actual area of ​​entering households: Accounting is based on the actual area to be measured, and after the completion of the light-return zone, it is basically guaranteed that the height from the top to the ground should not be lower than 2.75 m. After accounting, the maximum amount of guarantees can be guaranteed. Eliminates unnecessary wear during installation.
(3) Accounting of background wall: Since the size of the wall is irregular, the length of the wall must be adjusted while avoiding excessive loss.
(4) Calculation of stock preparation: 2 pieces of stock preparation are guaranteed in the same wall, and the background wall needs to be spliced ​​in large quantities to prepare more than 0.5 squares of stock.
3, sub-line bombs
According to the pattern of the integrated wall, the laying method (horizontal and vertical) of the keel is determined. The keel installation does not require the keel. According to the design and the external dimensions of the building, the starting position and the connection position of the slab seam are determined, and the horizontal and vertical lines are respectively displayed; After determining the position of the keel according to the overall dimensions of the various parts of the building and the length of the integrated wall surface, a vertical line is projected on the building wall surface; when the distance between the keel and the height is >3m, the general choice is between 400-500mm and the height is less than 3m. , The spacing is controlled between 500-600mm; According to the position of the fragment elastic line, hang perpendicular to the horizontal control line (the wall smoothness verticality control line); Hang the vertical and horizontal control lines around the yin and yang angle, window, balcony.
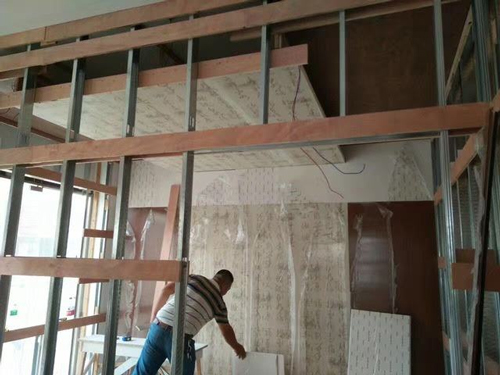
4, keel installation
Walls usually do not need to install keel, can be installed directly into the integrated wall surface, the ceiling needs to install the keel and then install the integrated wall; According to the overall thickness and the entire outer insulation system thickness ≤ 50mm requirements, between keel small corner horse and the keel is less than 10mm Should use rubber mats; galvanized keel installed by location, expansion bolts fixed; galvanized keel installation flatness and verticality allowable deviation within ± 2.5mm, installation can be used for the lower than the standard parts can be used to adjust the gasket; keel Should be made at the bottom of the lightning protection bridge, and reliable connection with the construction company grounding bus; expansion bolt embedded in the wall depth ≥ 50mm; behind the wall and below the surface of the keel and the composite insulation board to form an air insulation layer, air insulation Layer thickness between 10-20mm.
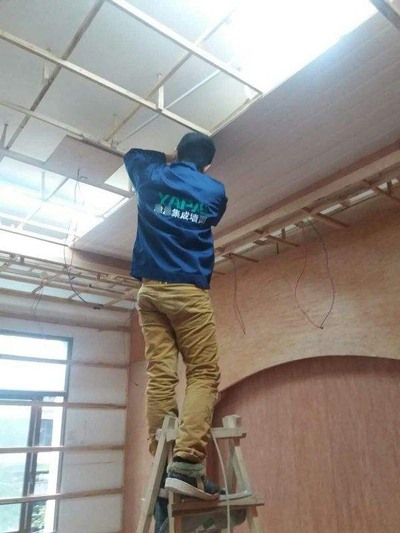
5, integrated wall installation
To cut the integrated wall according to the design drawings and the actual size of the wall, attention should be paid to the alignment of the pattern stitching seams; according to the horizontal control line, the integrated wall surface is installed from the bottom up, and the keel can be fixed by self-tapping screws or rivets. Missing; installation sequence: after the big corner after the patchwork, the first large wall, the back of the bottom window and the bladder, with the yin and yang angles and joints and other top-pressure fittings; accessories installed in addition to the use of screws or rivets fixed outside the application of waterproof plastic closed all Gap, no leakage shall occur; the connection between the integrated wall surface and the keel should not have an insulating layer to ensure lightning protection and reliable grounding; when the lower board is integrated on the integrated wall, a rubber hammer can be used to gently tap and gently insert the connector. Loosening the space can fix the gun nails. Note that when the gun nails are fixed, the edge of the board must be less than 15mm.
6, the top wall convergence processing
Between the top wall, the rice surface is bent as much as possible, and the V-groove is used to handle the angle.
Fourth, integrated wall installation acceptance
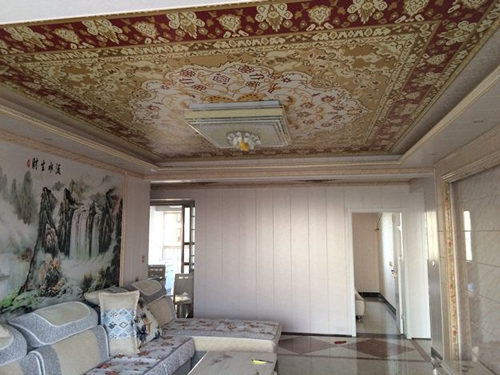
After the installation is complete, acceptance of the integrated wall surface is required. If so: the joints of the flat material are neat; the shut-out does not affect the appearance at all; the material is fixed firmly, the material at the wall is not hollow; the color is well-matched; the internal insulation layer has no external leakage Phenomenon; wave board docking complete without burr; fold at right angles, smooth and beautiful appearance, then you install the integrated wall surface is perfect.
In a word, there are many integrated wall products on the market, and the brands are endless. The installation method will be different, but the whole is the same. The installation steps are all according to the above installation steps. Regarding the integrated wall installation , I will briefly introduce you here and I hope to help you.
Integrated wall surface construction decoration wall integrated wall installation
Regular LED Grow Light 200W,LED Grow Lights For Plant 200W,200W Full Spectrum Grow Lights,200W Plant Lamps
Yichang Green Eco-agriculture Co., Ltd. , https://www.plantgrowlamp.com